

 By: Andy Wofford
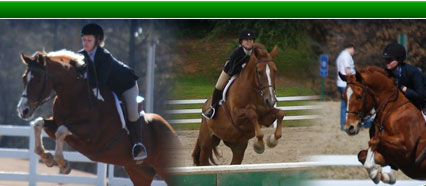
Tech Writer, Green Tree Horse Farm
So you’ve got a webcam you want to share with the world – but you don’t want the whole world sucking up your bandwidth at your home or business? I’ve done it – and had a good time setting it up. It was pretty easy. I’ll break it down into two parts. Part 1 will just be the camera and the setup, and part two will be getting the images to display on your website and pan/tilt the cameras.
From a high level – the cameras use an FTP connection to log into my web server in a directory to upload the pictures. The pictures are updated every 4 minutes for the most part. The Panasonic web cameras I use rename the existing picture to an older picture – and then place the new image on the server. From there I use JavaScript to allow someone viewing the website to move the cameras and get the latest image refreshed. There is some PHP involved in the back end – but it’s not very complicated.
Setting up the Panasonic Webcam:
 You
can use whatever brand of IP Network camera you choose. I like the
Panasonic brand because of its ability to allow you to move the image
via a URL and that they are less than $200. They also have a CGI
interface that's customizable, and you can block
out anyone from directly connecting to your cameras for a live image
even if they discover the URL to your cams. You have to have a login to
get live images but can set still shots and move the camera without
authentication.
You
can use whatever brand of IP Network camera you choose. I like the
Panasonic brand because of its ability to allow you to move the image
via a URL and that they are less than $200. They also have a CGI
interface that's customizable, and you can block
out anyone from directly connecting to your cameras for a live image
even if they discover the URL to your cams. You have to have a login to
get live images but can set still shots and move the camera without
authentication.
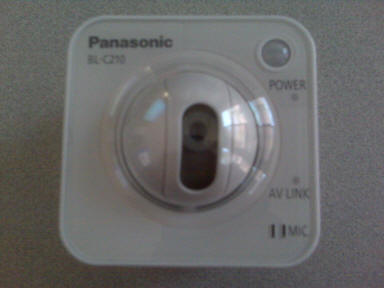
I have literally four different kinds of Panasonic Network Cameras – not on purpose – but they all fundamentally work the same way. The latest one is the BL-C210 camera that you can get cheaper from amazon.com than anywhere else I’ve looked. See the link on the right side of this column for the exact camera.
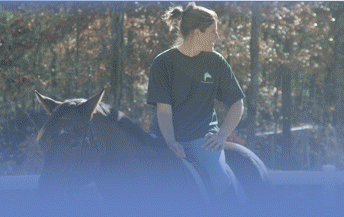
Installing it is a breeze – in my case we have a horse farm with eight stalls in the main barn and didn’t want to have to buy eight cameras. We have three that move around from stall to stall. I ran power up to the ceiling (which you don’t even have to do now with Power over Ethernet) and then ran CAT 6 cables up to connect each one to the router. From there you pop the disc into your computer, it locates the camera, and you start configuring. Just make sure the cameras aren’t going to be affected by moisture (like condensation from a metal barn roof).
Panasonic Webcam Configuration:
![]() These
instructions are specific to Panasonic webcams – but could be applied to
any camera. Once you run the setup wizard go ahead and connect to the
camera via IP address. Log in to the camera. You’ll want to make sure
that during the setup you chose a static IP address with a port that was
set up on your router via uPnP or manually.
These
instructions are specific to Panasonic webcams – but could be applied to
any camera. Once you run the setup wizard go ahead and connect to the
camera via IP address. Log in to the camera. You’ll want to make sure
that during the setup you chose a static IP address with a port that was
set up on your router via uPnP or manually.
Once you get past the initial setup with the date/time and IP address you’ll want to go to the triggers page. This is where you set your camera up to upload to a web server on a timed basis so that the rest of the world can see your images. This will use bandwidth to transfer the images to your web server – but not nearly as much as you would be using from inbound traffic going directly to your webcam if your site was popular.
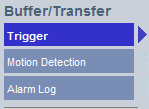 The Triggers link is on the right hand
side about halfway down on on the setup tab of the web page.
From the trigger page you’ll need to create a new timer. Note
that when you do create the new timer all of any previous images
you had stored on the camera itself will be erased (not sure why
Panasonic designed it this way).
The Triggers link is on the right hand
side about halfway down on on the setup tab of the web page.
From the trigger page you’ll need to create a new timer. Note
that when you do create the new timer all of any previous images
you had stored on the camera itself will be erased (not sure why
Panasonic designed it this way).
-
 So
click on the number of the trigger you want to set (Start with
number 1 if you don’t have any other triggers declared.
So
click on the number of the trigger you want to set (Start with
number 1 if you don’t have any other triggers declared. -
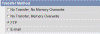
 You
will want to check the box next to "Enable Image/Buffer transfer"
and set the trigger type for the selection to "Timer"
You
will want to check the box next to "Enable Image/Buffer transfer"
and set the trigger type for the selection to "Timer" - For the timer setting make sure all of the days are checked and the radio button next to "Always" is selected.
-
 You
can set the resolution to whatever you want – I wanted to use less
bandwidth so I set mine to the smaller size. I also like a clearer
picture since mine are only transferring every 2 minutes.
You
can set the resolution to whatever you want – I wanted to use less
bandwidth so I set mine to the smaller size. I also like a clearer
picture since mine are only transferring every 2 minutes.
-
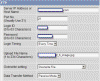
 Next
comes the actual timer setting. This can get tricky if you aren’t
good at math. For me – I wanted this camera to transmit every 2
minutes. So here is the setting I used: Every 1 hour It would
"buffer" 30 images (60 minutes /30 images = 2 minutes per image).
Next
comes the actual timer setting. This can get tricky if you aren’t
good at math. For me – I wanted this camera to transmit every 2
minutes. So here is the setting I used: Every 1 hour It would
"buffer" 30 images (60 minutes /30 images = 2 minutes per image).
-
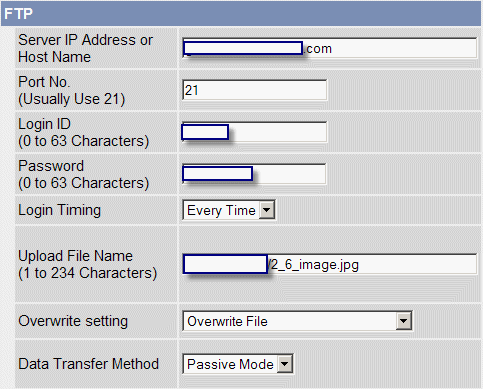
 On
the next page you want to make sure you have FTP set up for the type
of transfer you would like to perform. FTP is File Transfer Protocol
and it’s a transfer method you can use with your web server to push
images up. Most web servers support FTP (better yet – SFPT) as a
method to transfer images.
On
the next page you want to make sure you have FTP set up for the type
of transfer you would like to perform. FTP is File Transfer Protocol
and it’s a transfer method you can use with your web server to push
images up. Most web servers support FTP (better yet – SFPT) as a
method to transfer images. -
 On
the last and final step you will want to configure your settings to
upload. This is one of the most important steps. If you don’t know
what these are most likely you can get them from your hosting
provider or a control panel that you log into your website with.
On
the last and final step you will want to configure your settings to
upload. This is one of the most important steps. If you don’t know
what these are most likely you can get them from your hosting
provider or a control panel that you log into your website with.
- Your server IP or hostname is usually your website URL or ftp.yourwebsite.com. Standard FTP port is 21 unless your hosting provider changed it.
- Your login ID and password would be issued from your hosting provider.
- The timing should be every time unless your hosting provider will allow you to open a session for a period of time.
- The upload filename should be a directory on your website that you can FTP to. This is probably the most common error in getting to the published webcam image. You want to make sure that the webcam can get to the directory you specify when it is trying to FTP.
- I would set the camera to Overwrite the File – or the filename will constantly change and you’ll risk filling up the space on your web server very quickly
- The data transfer method depends on your FTP server – but I use passive mode (which is the most common.
Next we’ll discuss how to display those images on your website.
![]()
![]()